Stitch Expo Production Guide
Fabric Cutting in Garment Production
Understand fabric spreading, marker alignment, cutting accuracy, component numbering and production bundling in clothing manufacturing.
Accurate cutting depends on controlled fabric relaxation, spreading, marker placement, equipment, operator skill, identification and bundling. Errors at this stage can affect every garment produced from the lay.
What Is Fabric Cutting in Garment Production?
Fabric cutting is the manufacturing stage in which layers of fabric are separated into the individual components required to assemble a garment. Cutting normally follows approved pattern development, grading and marker planning.
The output can include front and back bodies, sleeves, collars, cuffs, waistbands, pockets, facings, linings and other parts. These pieces must retain the correct shape, size, orientation, quantity and identification before they move to sewing.
Why Cutting Accuracy Matters
A cutting defect is rarely limited to one isolated seam. If a complete lay is misaligned or distorted, the same problem can be repeated across many garments.
Garment measurements
Correctly shaped components help the sewn garment meet approved specifications.
Seam matching
Accurate edges and notches allow joining seams and panels to align during assembly.
Appearance
Grain, nap, stripes, checks and engineered prints must be correctly oriented and matched.
Material usage
An efficient marker reduces avoidable fabric waste without compromising component quality.
Production consistency
Numbering and bundling keep matching components together throughout sewing.
Delivery performance
Early control reduces recutting, shortages, delays and unplanned material consumption.
Pre-Cutting Fabric Preparation
Cutting should begin only after the material, patterns, marker and order details have been verified. The exact controls depend on the fabric and product.
- Confirm fabric type, colour, lot and usable width
- Inspect rolls for visible faults, shade variation and damage
- Check the approved pattern and marker revision
- Verify size ratio and required cut quantity
- Review grain, nap, face direction and print direction
- Confirm relaxation requirements for the material
- Check shrinkage or wash-test information
- Plan allowances for defects and end loss
- Ensure the cutting table and equipment are clean and suitable
Fabric relaxation
Some knit, stretch and rolled materials can retain tension from winding, finishing or transport. Relaxation allows the fabric to recover toward a more stable condition before spreading and cutting. The required method and duration vary with the material; a universal relaxation time should not be assumed.
Fabric Spreading
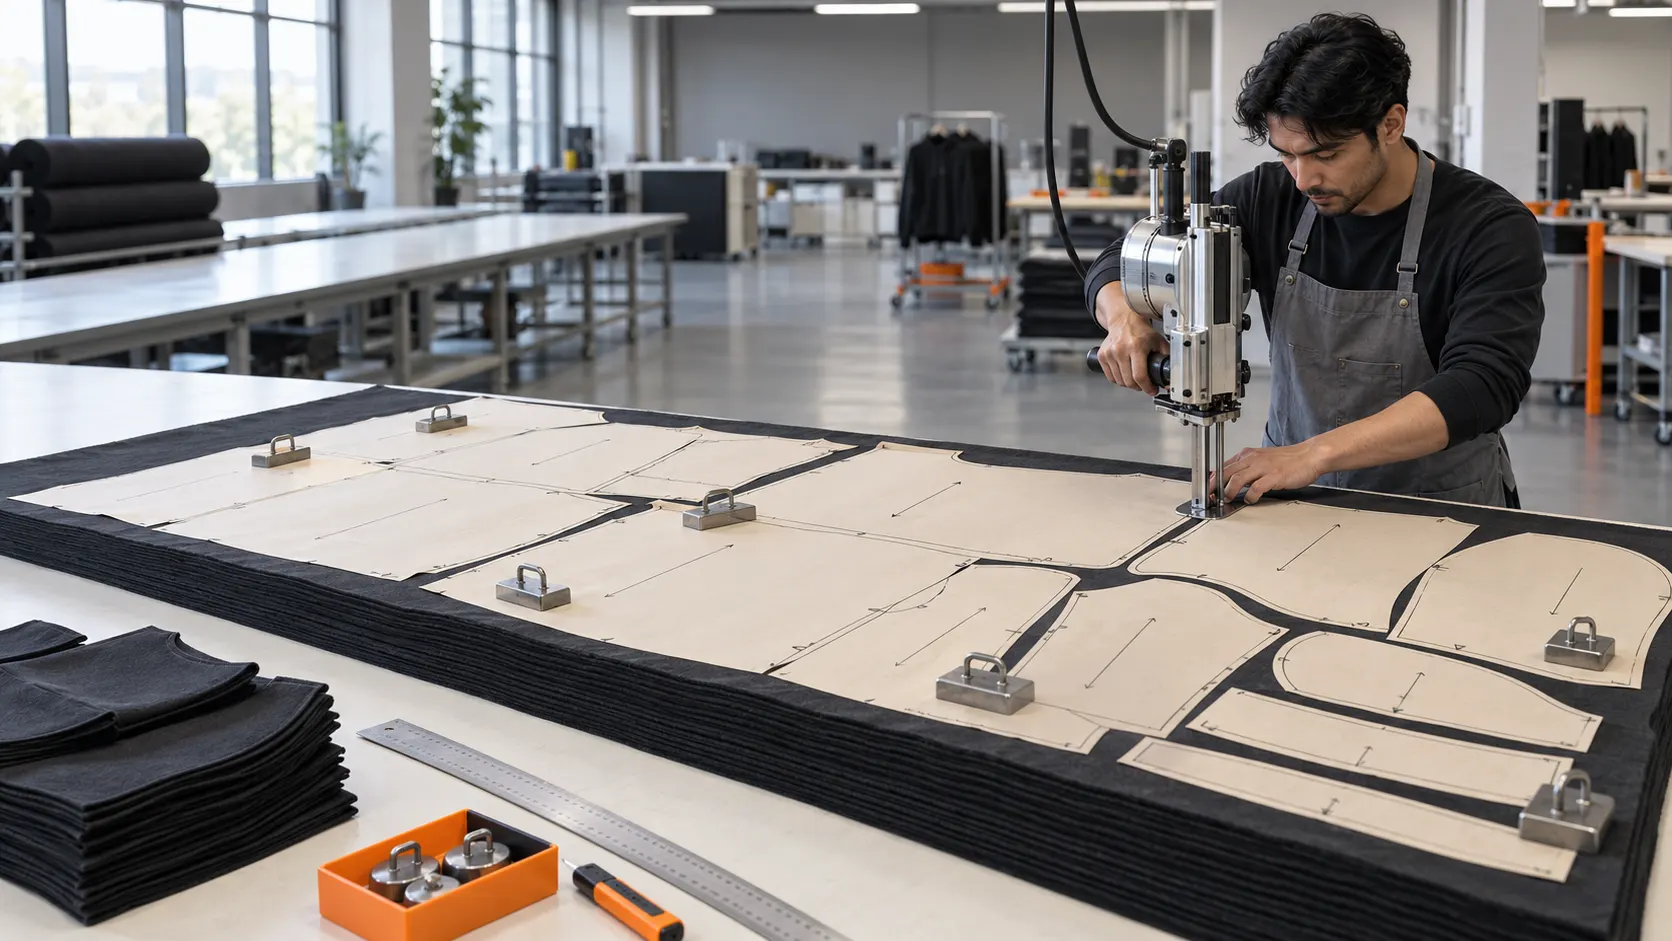
Spreading is the process of laying fabric in one or more plies on the cutting table. The objective is to create a flat, stable lay with the correct length, width, direction and number of layers.
Key spreading controls
- Keep plies flat without wrinkles or folds
- Avoid stretching or excessive tension
- Align fabric edges within the marker width
- Maintain the required face and nap direction
- Separate shade lots when necessary
- Control ply count and lay height
- Identify or remove critical fabric defects
- Prevent narrow fabric from leaving incomplete components
Marker Planning and Alignment
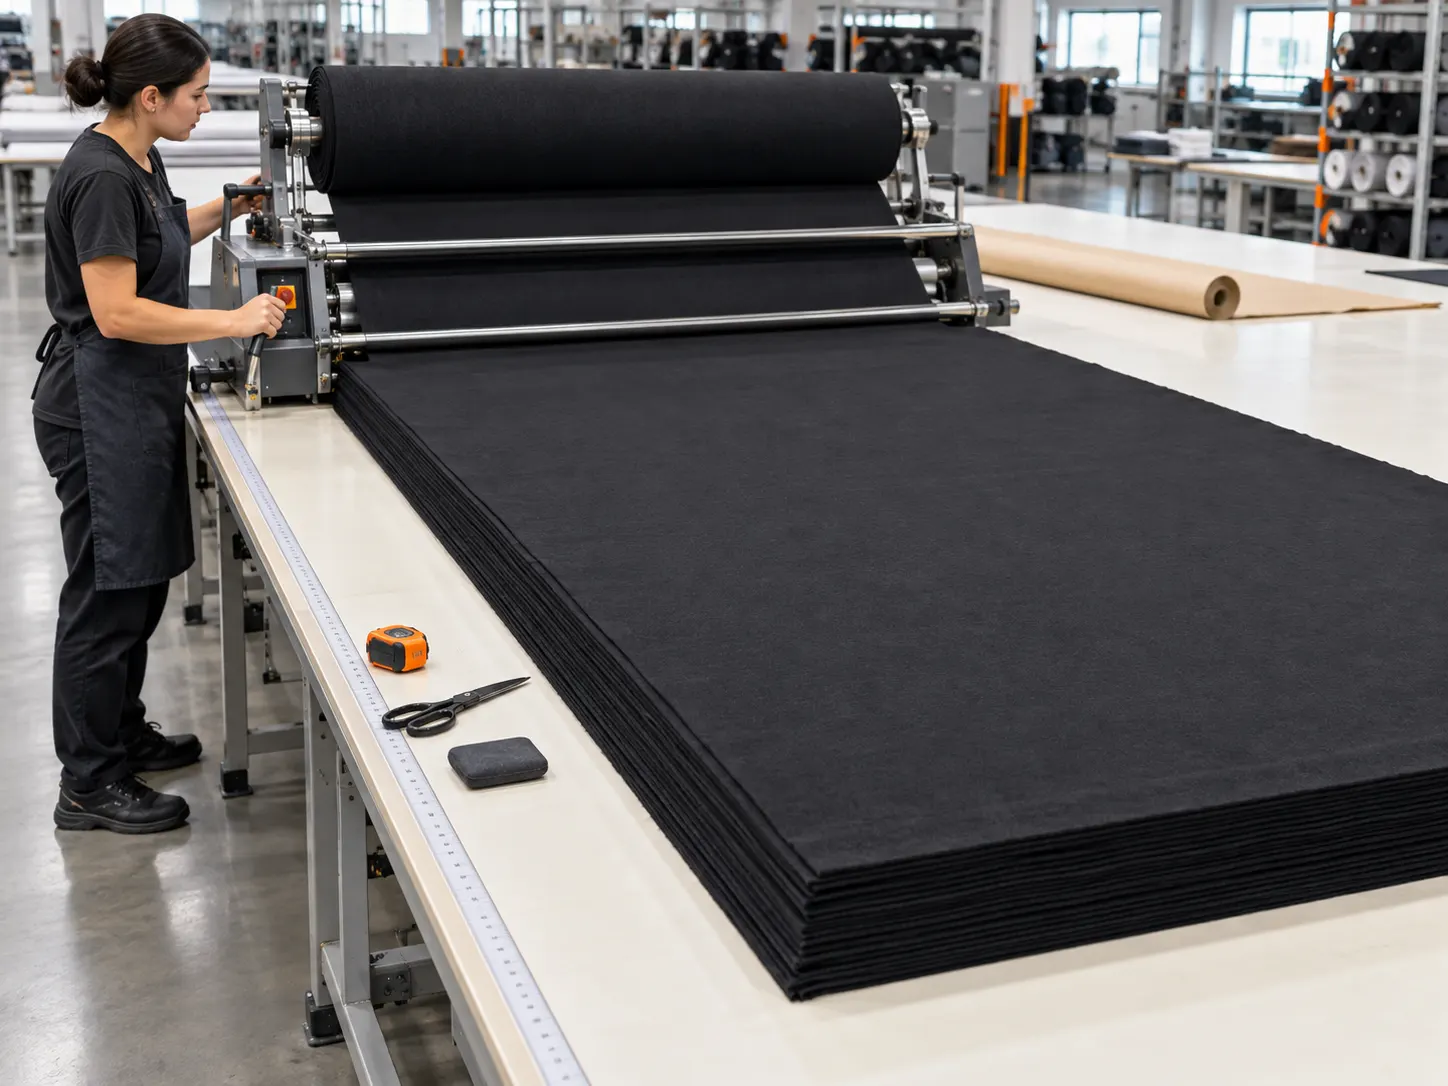
A cutting marker is an arrangement of graded pattern pieces within the usable fabric width. It defines how components will be positioned for cutting and helps manage material utilization.
What marker planning considers
- Fabric width and usable area
- Order quantity and size ratio
- Grainline and stretch direction
- Nap, pile or one-way surface
- Directional prints and engineered artwork
- Stripe or check matching requirements
- Pairing and symmetry
- Number of pattern pieces per garment
- Cutting equipment and lay restrictions
The marker must be placed squarely on the fabric lay. If it shifts, twists or extends beyond the usable width, components may become distorted, incomplete or incorrectly oriented.
Fabric Cutting Methods
| Cutting method | Typical use | Main considerations |
|---|---|---|
| Hand shears | Samples, single plies, delicate work and small quantities | Flexible but dependent on operator control and slower for volume |
| Straight-knife machine | Multi-ply production lays | Versatile; lay height, blade condition, vertical accuracy and operator safety matter |
| Round-knife machine | Lower lays, straighter shapes and smaller cutting work | Portable but less suitable for some tight curves or high lays |
| Band knife | Precise cutting of blocks or smaller component stacks | Material is guided toward a fixed blade; templates and safe handling are important |
| Die cutting | Repeated small shapes such as patches, collars or accessories | Fast and consistent after tooling, but dies add cost and are style-specific |
| Automated cutting | Digitally controlled production cutting | Can improve speed and consistency; setup, vacuum control, maintenance and data accuracy remain essential |
| Laser cutting | Selected synthetics, intricate components or specialized applications | Heat response, edge appearance, fumes, colour change and material suitability must be evaluated |
No method is automatically best for every garment. Selection depends on material behaviour, layer count, shape complexity, accuracy, quantity, equipment and safety controls.
Fabric Cutting Process: Step by Step
Review the cutting order
Confirm style, colour, size ratio, quantities, material, pattern revision and special matching instructions.
Inspect and prepare the fabric
Verify rolls, shade groups, width and defects, then relax the fabric where required.
Prepare the marker and lay plan
Confirm marker length, width, pattern components, size ratio, ply count and material direction.
Spread the fabric
Build a flat, aligned lay while controlling tension, edges, face direction, nap and defects.
Position and secure the marker
Align the marker with the lay and prevent movement during cutting.
Cut the main components
Follow marker lines using suitable equipment while controlling blade condition, accuracy and safety.
Cut notches and drill marks
Transfer essential assembly and placement references without weakening or damaging the components.
Inspect the cut parts
Check shapes, top-to-bottom ply accuracy, pairs, notches, quantities and visible defects.
Number and bundle components
Keep matching garment pieces together and identify the style, size, colour and bundle quantity.
Issue bundles to sewing
Record movement and release complete, verified bundles according to the production plan.
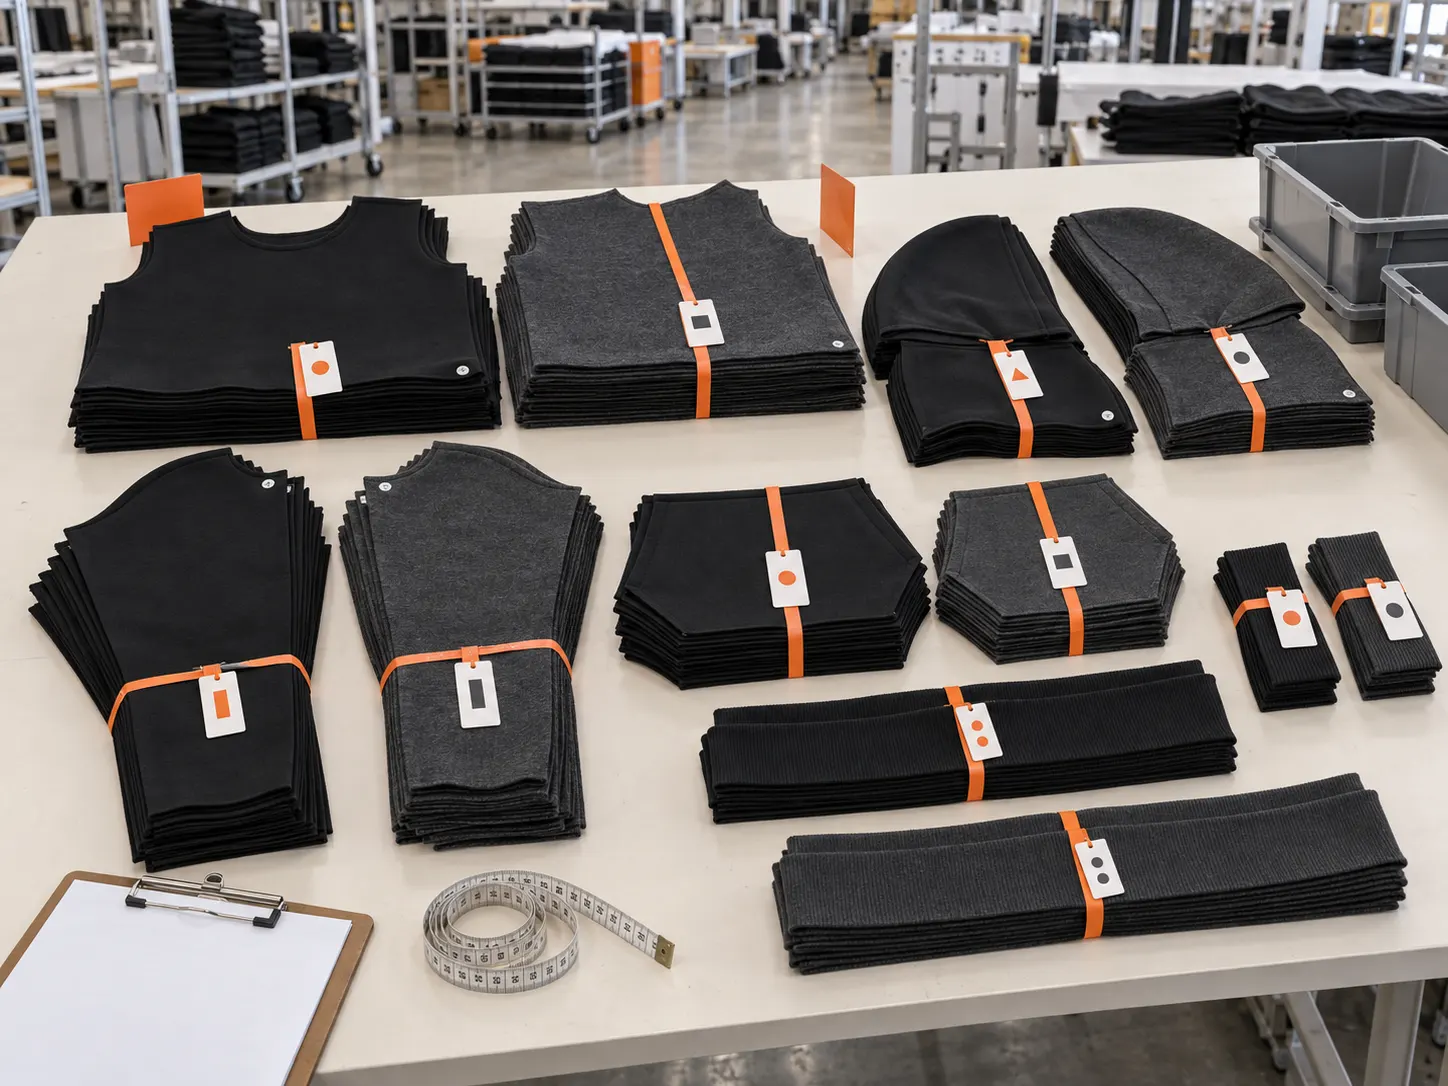
Numbering, Sorting and Bundling
After cutting, components are sorted into complete garment sets or controlled bundles. Identification helps prevent mixing between sizes, colours, shade lots and different positions within a lay.
A bundle ticket may identify:
- Style or order number
- Colour and fabric lot
- Garment size
- Bundle number
- Quantity of components
- Component name or operation group
- Lay or cut reference
Numbering is especially important when shade variation may exist within a roll or lay. Matching components from the same garment position helps maintain consistent appearance.
Fabric Cutting Quality-Control Checklist
- Correct fabric, colour and lot used
- Correct pattern and marker revision
- Marker within usable fabric width
- Required ply count achieved
- Lay flat and free from unintended tension
- Grain, nap and print direction correct
- Top, middle and bottom plies checked
- Cut edges clean and accurate
- Notches and drill marks correctly placed
- Paired and mirrored pieces complete
- Defective components identified or recut
- Sizes and shades kept separate
- Bundle quantities verified
- Cutting records completed
Common cutting defects
| Defect | Possible cause | Potential result |
|---|---|---|
| Mis-cut shape | Marker movement, poor line control or blade deflection | Incorrect measurements or mismatched seams |
| Fused edges | Heat generated during cutting of heat-sensitive synthetics | Plies stick together or edges become damaged |
| Ragged edges | Dull blade, unsuitable equipment or unstable lay | Poor seam accuracy and handling difficulty |
| Notch damage | Notches cut too deeply or in the wrong position | Weak edges or incorrect assembly alignment |
| Shade mixing | Inadequate roll separation, numbering or bundling | Visible colour differences within one garment |
| Missing components | Incomplete marker, counting error or bundle loss | Sewing interruption and recutting delays |
Cutting Considerations for Different Fabrics
Knit and stretch fabrics
Knits can stretch, curl or relax after cutting. Control lay tension, relaxation, blade sharpness and handling. Stretch direction must match the approved marker.
Woven fabrics
Check grain alignment, fraying, directional surfaces and stripe or check matching. Slippery woven fabrics may require additional stabilization.
Fleece and brushed fabrics
Nap direction can create visible colour or texture differences. All components may need one-way placement. Loose fibres also require housekeeping and equipment maintenance.
Denim
Heavy constructions require appropriate equipment and controlled lay height. Grain direction, shade continuity and later wash shrinkage are important.
Printed and sublimated panels
Engineered artwork must align with pattern outlines, registration marks and seam positions. Cutting tolerance should be considered during artwork preparation.
Coated and technical fabrics
Surface damage, creasing, heat sensitivity, layer slippage and puncture marks may require specialized handling and equipment.
Questions Answered
Fabric Cutting FAQs
What is fabric cutting in garment production?
It is the controlled process of cutting fabric lays into the individual pattern components required to sew a garment.
What is fabric spreading?
Fabric spreading is the process of laying one or more flat plies on a cutting table at the required length, width, direction and layer count.
What is a marker in garment cutting?
A marker is an arrangement of graded pattern pieces within the usable fabric width. It guides cutting and helps manage material consumption.
Why is fabric relaxation important?
Some fabrics retain tension from rolling or processing. Suitable relaxation helps them stabilize before cutting, reducing dimensional change after components are cut.
What is marker efficiency?
Marker efficiency describes the percentage of marker area occupied by pattern pieces. It is useful for material planning but must not compromise grain, matching or accuracy.
Why are cut components numbered?
Numbering helps keep matching components together and prevents mixing between sizes, shades, colours, lays or orders.
Which cutting machine is best?
There is no universal best machine. The right method depends on fabric type, lay height, component shape, production quantity, required accuracy and available equipment.
How does cutting affect garment quality?
Inaccurate cutting can change garment measurements, disturb seam matching, misalign prints, create shade variation and cause production shortages.
Can all fabrics be spread and cut in the same way?
No. Stretch, nap, pile, coating, thickness, slippage, heat sensitivity and print direction require different spreading and cutting controls.
What happens after fabric cutting?
Components are inspected, numbered, sorted and bundled before being issued to sewing or to preparation operations such as fusing, embroidery or printing.
Precision From Pattern to Production
Develop Your Garments With Stitch Expo
Stitch Expo supports clothing brands through pattern development, sampling, fabric selection, controlled cutting, custom decoration and bulk apparel manufacturing.